How to build a lightweight, static microsite powered by Node, Nunjucks, and Contentful
In this guide, I will walk you through using Node and Nunjucks to create a minimal system for generating ultra-lightweight static microsites entirely from data hosted for free on Contentful.com—just like this one!
But why?
Have you ever come back to a project after a few months only to find that it feels stale and outdated, because in that time Webpack or some other fad library you were using released a new major version?
What about when you want to add some code to a site you built barely a year ago, and yet you can’t even get it to work locally anymore? *Raises hand* ✋
The world of tech—especially that of frontend tech—moves extremely quickly. And although it’s fun to experiment and use the latest technology, sometimes it feels good to build something that lasts.
I love microsites, and it’s my opinion that tech shouldn’t ever need to do a lot—it should just do one thing really well. So, my goals for this project are as follows:
-
Static yet dynamic
The project should be able to generate a static website entirely from data defined in an external CMS, and then automatically update itself when new content is published.
-
Free
The CMS should be free to use, and the static website should be free to host.
-
Lightweight
The project should use as few dependencies as possible. This reduces the risk of an app breaking due to a potential future supply chain breakdown.
-
Evergreen
The project shouldn’t rely on any fad libraries that need frequent upgrading (Webpack, Gatsby, etc.), and still feel fresh at least two years later.
Suffice it to say, if you’re looking for a tutorial which uses React, Webpack, Parcel, Gatsby, or other similar popular technology to help build your app, this might not be the tutorial for you. These technologies, although powerful, are antithetical to the goals of this project.
That said… buckle up, this is a long one.
Contents
Some quick housekeeping ↴
TL;DR:
License
Creative Commons Attribution-NonCommercial-ShareAlike 4.0 International (CC BY-NC-SA 4.0).
This is free for personal use. For commercial use, or if you’re not sure, please contact me.
Requirements
A computer with Node.js v16 (or above) and npm.
A baseline familiarity with git, frontend web development, building Node.js apps, and working on the command line.
Let’s begin ↴
Project setup
First, create your project folder.
For this tutorial, I’m using app.
Initialize git ↴
git init
Create .gitignore ↴
.DS_Store
.env
dist
node_modules
Initialize npm ↴
npm init -y
Edit the package.json ↴
{
  "name": "app",
  "version": "1.0.0",
  "private": true,
  "type": "module",
  "scripts": {}
}
Create an empty .env file. We’ll use this later.
Create three directories inside of your project folder: lib, src, and scripts.
At this point in the tutorial, your project should look like this (ignoring .git) ↴
app/
├─ lib/
├─ scripts/
├─ src/
├─ .env
├─ .gitignore
└─ package.json
With the base structure set up, we’re now ready to move on to creating a system for managing templates.
Templating library
For this project, we’re going to use Nunjucks as our templating library.
Nunjucks is a powerful templating library by Mozilla heavily inspired by Jinja2, featuring block inheritance, autoescaping, macros, asynchronous control, and more.
Although it’s not as popular as it used to be, it’s still my templating library of choice. Pug (formerly Jade) is a close second.
You can, of course, use any templating library you prefer, like Pug, EJS, Handlebars, etc. You’ll just need to know on your own when and where to make the appropriate adjustments to the code.
As a first step, install nunjucks ↴
npm install nunjucks
Next, we need to create a Nunjucks environment for rendering templates.
Create lib/nunjucks.js ↴
import nunjucks from 'nunjucks';

const env = nunjucks.configure('src');

export default env;
We’ll expand on this file in the future, but for now this is all we need.
Now, we need a Nunjucks template to render in order to verify our system is configured properly.
Create src/page.njk ↴
<p>{{ message }}</p>
Next, let’s create a new script which will build our app. The script will pass in the message as template context (ctx). For now, all it will do is render the template using Nunjucks.
Create scripts/build.js ↴
import nunjucks from '../lib/nunjucks.js';

const ctx = {
  message: 'It works!',
};

nunjucks.render('page.njk', ctx, (err, res) => {
  if (err) throw err;

  console.log(res);
});
Give it a go ↴
node scripts/build.js
You should see the following returned back to you on the command line ↴
<p>It works!</p>
If not, you might need to go back and verify you’ve followed the steps correctly up until this point.
Now let’s set up an npm script to run this for us. In your package.json, add the following to scripts ↴
{
  // ...
  "scripts": {
    "build": "node scripts/build.js"
  }
}
Run the npm script in your terminal ↴
npm run build
You should see the same output as before.
Next, we want our script to automatically write all our built files to a dist folder. It’s the dist folder which will be served to visitors of our site.
Update scripts/build.js ↴
import fs from 'fs';

import nunjucks from '../lib/nunjucks.js';

const ctx = {
  message: 'It works!',
};

nunjucks.render('page.njk', ctx, (err, res) => {
  if (err) throw err;

  fs.mkdir('dist', () => {
    fs.writeFile('dist/index.html', res, 'utf-8', () => {
      console.log('Wrote "dist/index.html"');
    });
  });
});
Our build script will now automatically create a dist directory (if one doesn’t already exist) and then write our file to dist/index.html.
Let’s expand on this. Let’s create a layout file that our page will extend from. This layout file will include all the necessary markup for an HTML page.
Create src/layout.njk ↴
<!DOCTYPE html>
<html lang="en">
  <head>
    <meta charset="utf-8">
    <title>My app</title>
    <meta name="viewport" content="width=device-width, initial-scale=1.0"/>
  </head>
  <body>
    <div id="content">
      <main id="main">
        {% block content %}
          {# Page content goes here. #}
        {% endblock %}
      </main>
    </div>
  </body>
</html>
The {% block %} tag is super important here, as it allows us to inject content into the layout. We can consume this on our page.njk, so long as we inherit from the layout we just created using {% extends %}.
Update page.njk ↴
{% extends "layout.njk" %}

{% block content %}
  <p>{{ message }}</p>
{% endblock %}
Now, run your build script again.
If all went well, rendered file should have had it’s content block replaced with the block we defined in page.njk.
It should look like this ↴
<!DOCTYPE html>
<html lang="en">
  <head>
    <meta charset="utf-8">
    <title>My app</title>
    <meta name="viewport" content="width=device-width, initial-scale=1.0"/>
  </head>
  <body>
    <div id="content">
      <main id="main">
        <p>It works</p>
      </main>
    </div>
  </body>
</html>
We now have a pretty solid templating system in place!
Note that any time you make changes to these files, they won’t automatically rebuild. To see your changes reflected after any change, you will need to rebuild your project using the build script npm run build.
At this point in the tutorial, your project should look like this (ignoring .git, dist, and node_modules) ↴
app/
├─ lib/
│  └─ nunjucks.js
├─ scripts/
│  └─ build.js
├─ src/
│  ├─ layout.njk
│  └─ page.njk
├─ .env
├─ .gitignore
└─ package.json
Markdown support
The next piece of the puzzle is markdown support. The dynamic page data we’ll be getting from Contentful later on will be returned to us in markdown, so we need to tell Nunjucks how to handle it.
For this, we’ll use a custom Nunjucks filter.
For markdown support, we’ll use markdown-it. markdown-it is a markdown parser that is super extensible and can be expanded to fit your needs. For example, LaTeX math support, code syntax highlighting, footnotes, etc.
First, install markdown-it ↴
npm install markdown-it
Now let’s set it up like we did Nunjucks.
Create lib/markdown.js ↴
import md from 'markdown-it';

const markdown = md({
  linkify: true,
  breaks: true,
  html: true,
  typographer: true,
});

export default markdown;
Then, hook up the markdown renderer to Nunjucks using a custom filter.
Update lib/nunjucks.js ↴
import nunjucks from 'nunjucks';
import markdown from './markdown.js';

const env = nunjucks.configure('src');

env.addFilter('markdown', (str) => {
  return markdown.render(str);
});

export default env;
Now let’s tell our page template to interpret incoming data as markdown.
Update src/page.njk ↴
{% extends "layout.njk" %}

{% block content %}
  {{ message | markdown | safe }}
{% endblock %}
This new code essentially translates to ↴
safe(markdown(message))
safe is a built-in Nunjucks filter, and it tells Nunjucks that we know the content is safe to render as HTML, rather than attempting to escape certain characters.
markdown is the filter we just created. Let’s use it by sending some markdown to the template.
Update scripts/build.js ↴
const ctx = {
  message: '# It works!',
};
Rebuild your project, and now you should see <h1>It works!</h1> in the built index.html.
At this point in the tutorial, your project should look like this (ignoring .git, dist, and node_modules) ↴
app/
├─ lib/
│  ├─ markdown.js
│  └─ nunjucks.js
├─ scripts/
│  └─ build.js
├─ src/
│  ├─ layout.njk
│  └─ page.njk
├─ .env
├─ .gitignore
└─ package.json
Next up, dynamic data using Contentful as our CMS.
Hooking up Contentful
Contentful.com is an online CMS with a modern API and SDKs which will allows us to consume content within our app.
Their free pricing tier allows you to create one space, which is all we need. Go ahead and sign up for Contentful, and create a new space for your website.
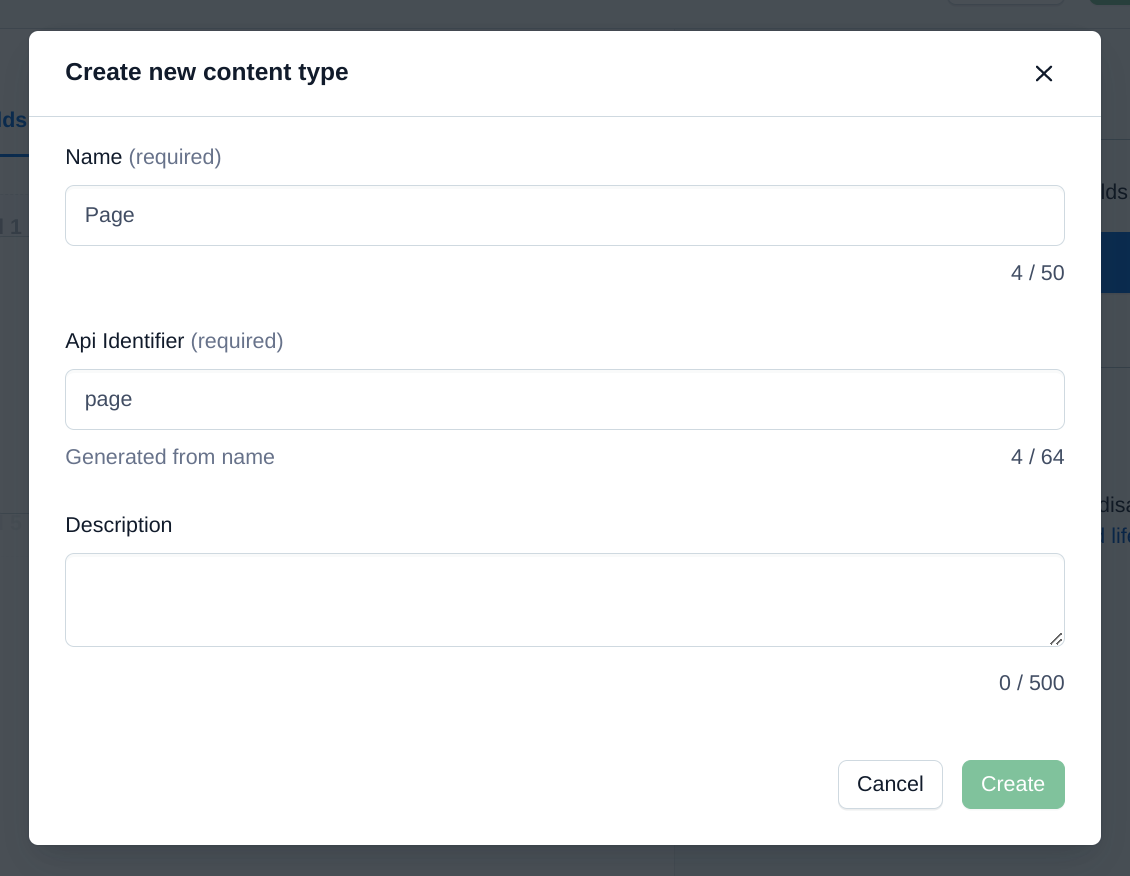
Before we can create content, we need to define a content type.
Name the model Page and keep the default API identifier as page.
Now we need to add some fields for our content type.
Choose Text (not Rich text), and name the field Title. Make sure this is a Short text, exact search field, not Long text.
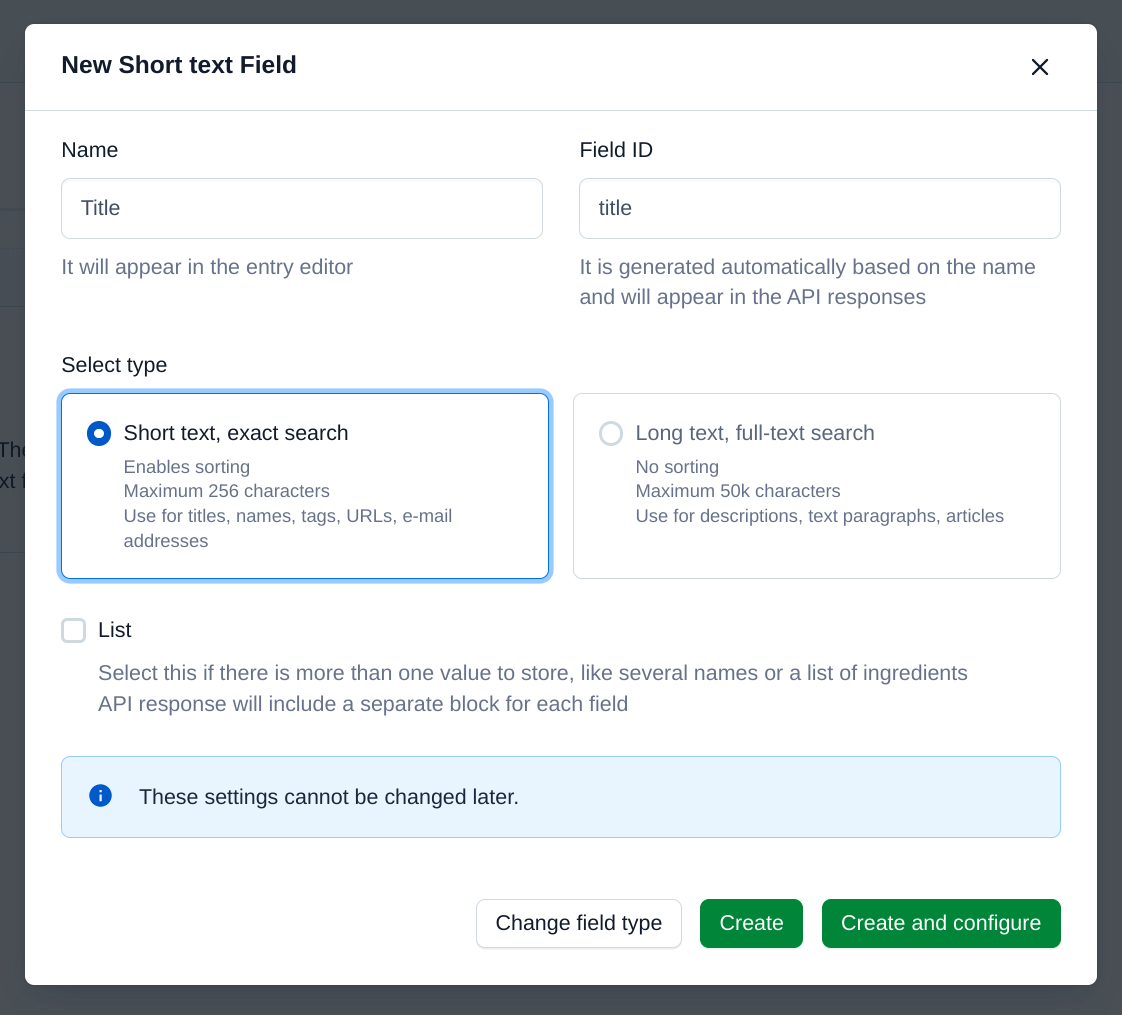
Click Create.
Now, let’s create another field. Choose Text again, and call this field URL. This time, click Create and configure.
In settings, check the This field represents the Entry title checkbox. I know the previous filed was technically called the title, but since this field is more globally unique, it’s better to use on this one.

Next, click on the Validation tab, and select the checkbox for Required field, Unique field, and Match specific pattern.
For the pattern, choose Custom, and enter ^\/([\w-]+\/?)*$. This just ensures that whatever we put there is a valid URL path, like /foo/bar. This matters for later.
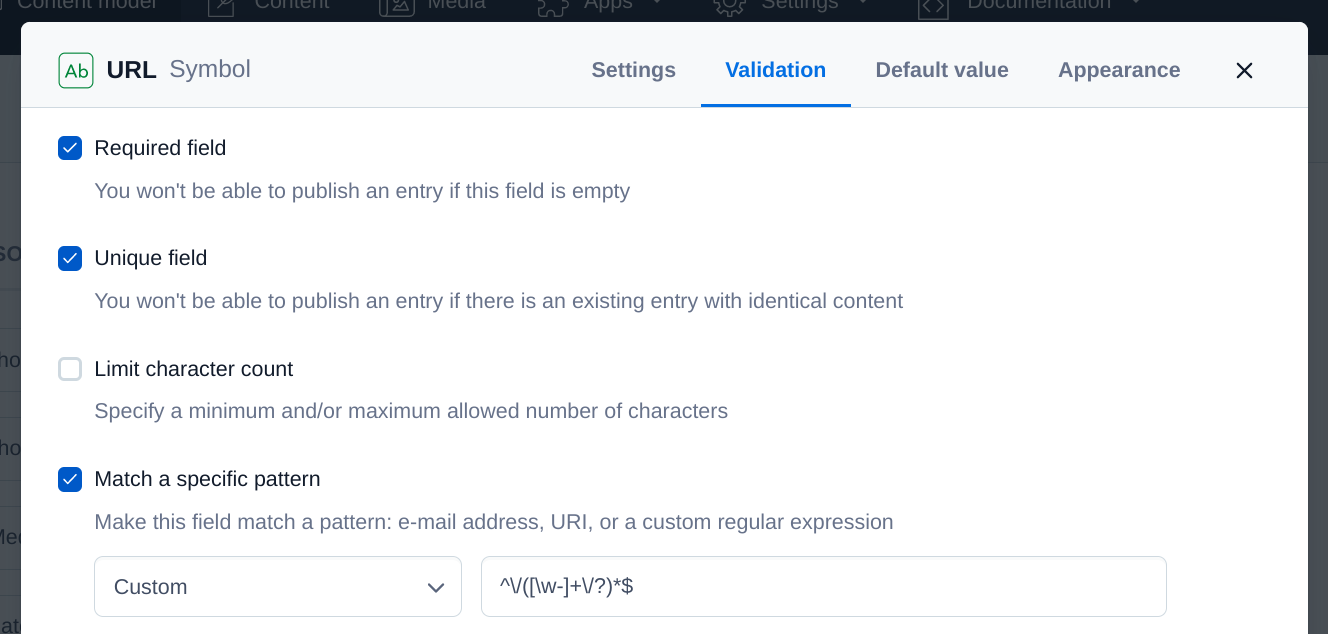
Click Confirm.
Lastly, we need to create one more field for our actual page content. Call this field Content, and this time choose Long text, full-text search for the type.
Click Create and configure.
Mark this as a required field under validation, and then under the Appearance tab, choose Markdown.
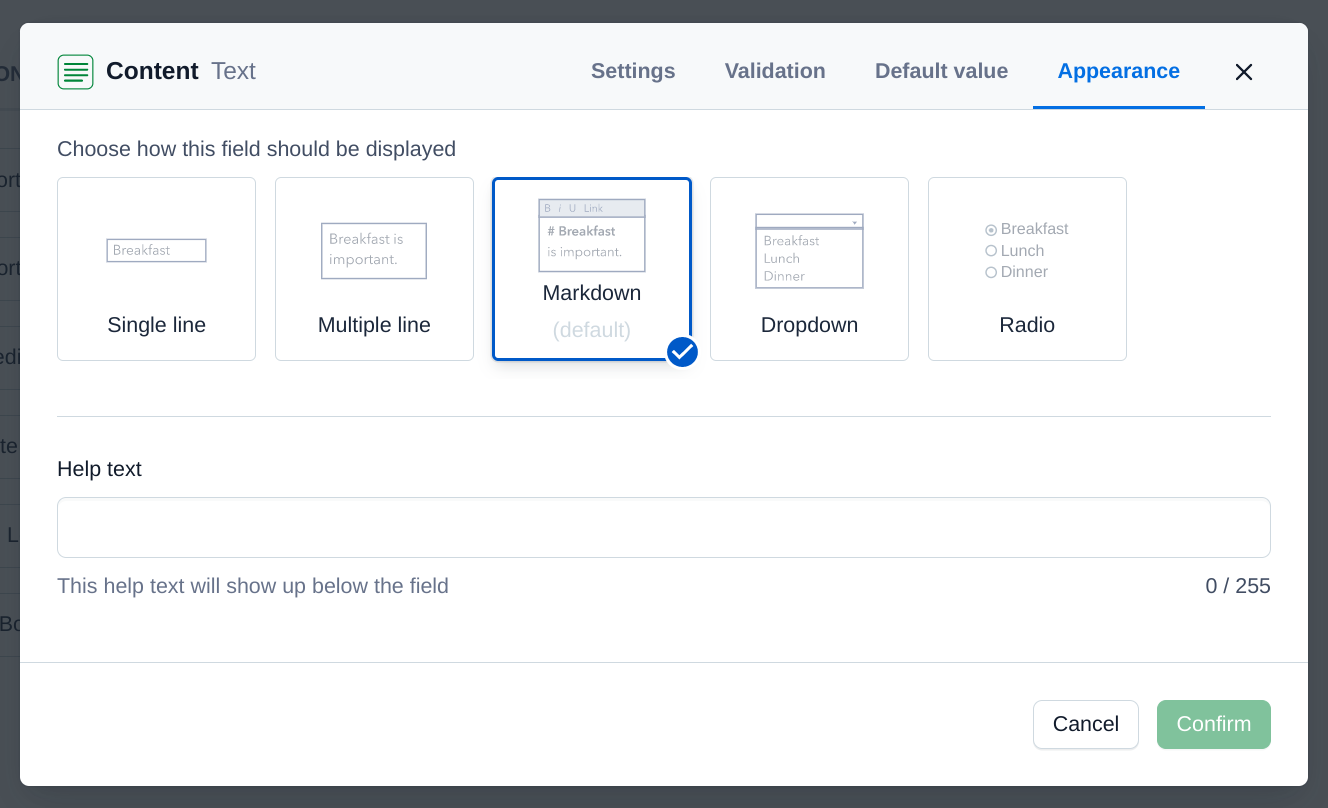
Click Confirm.
With that all set, save your content type and then navigate to the Content tab.
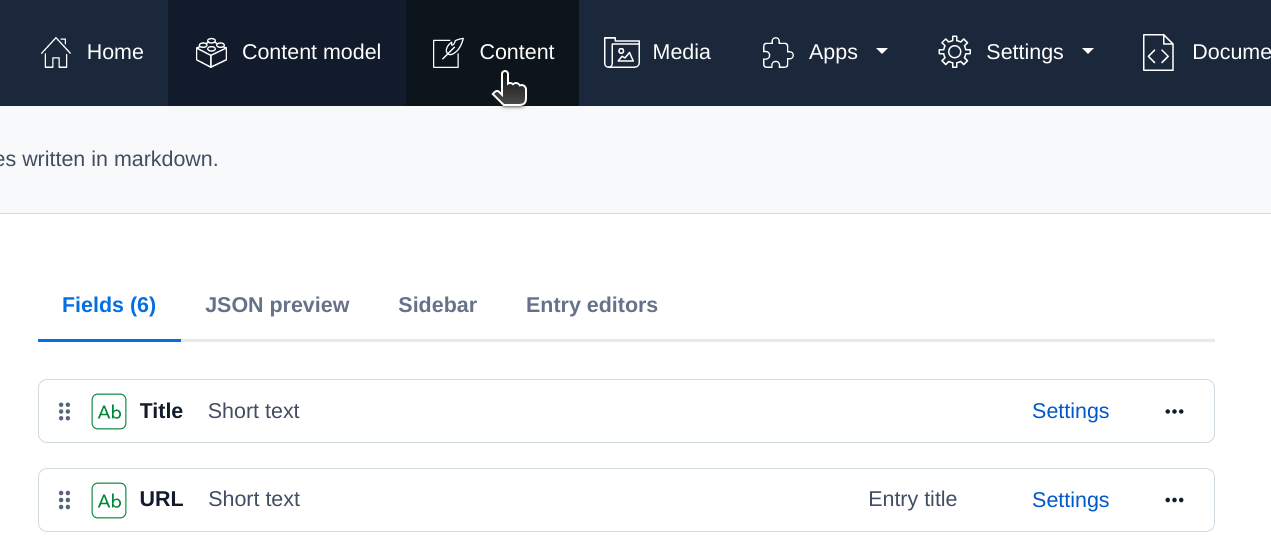
Click Add entry.
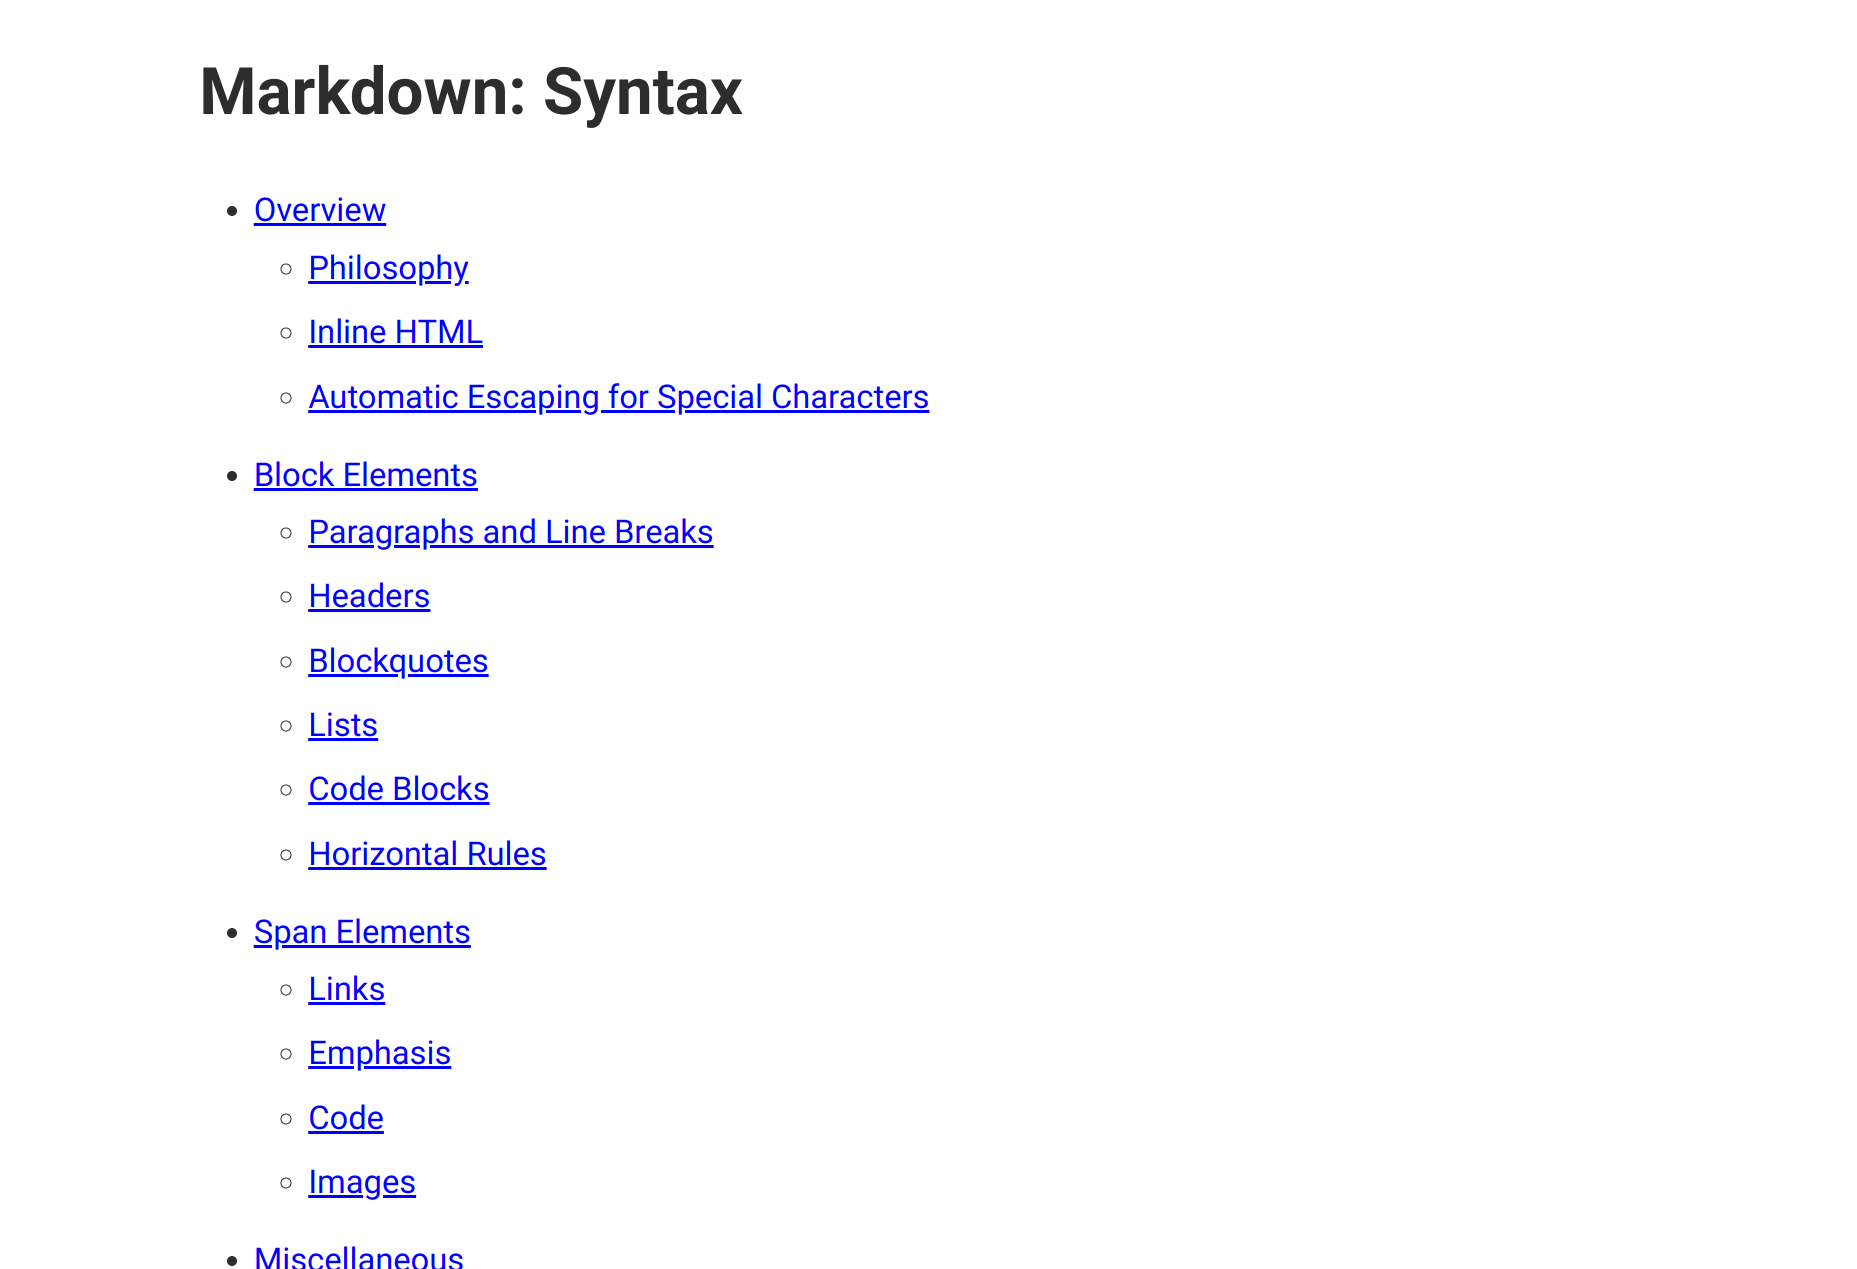
Add some test data. I chose Test for the title and /test for the URL. For the content, I recommend copying and pasting the contents of this markdown test file. In fact, if you go to /test on my website here, you’ll see the same file.
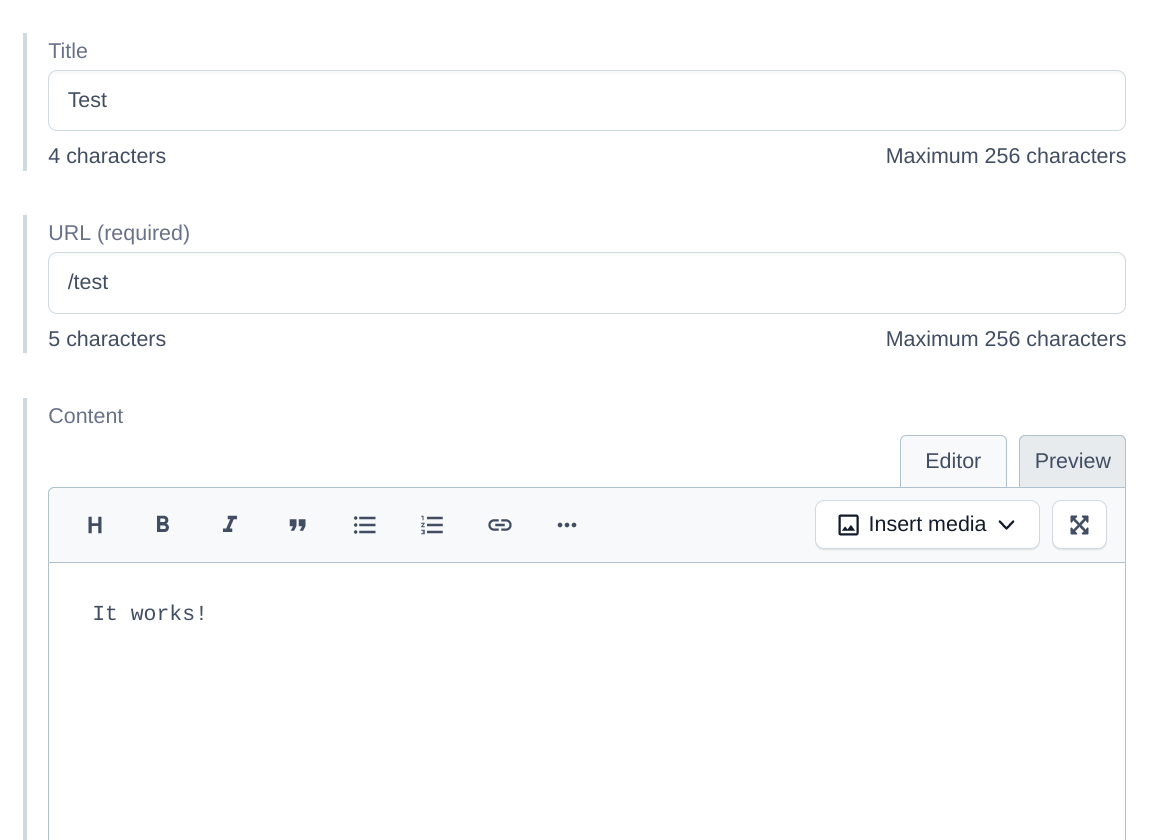
Click Publish.
Now we need to consume this data in our app. To do that, we need to set up an API key.
Navigate to Settings and select API keys.
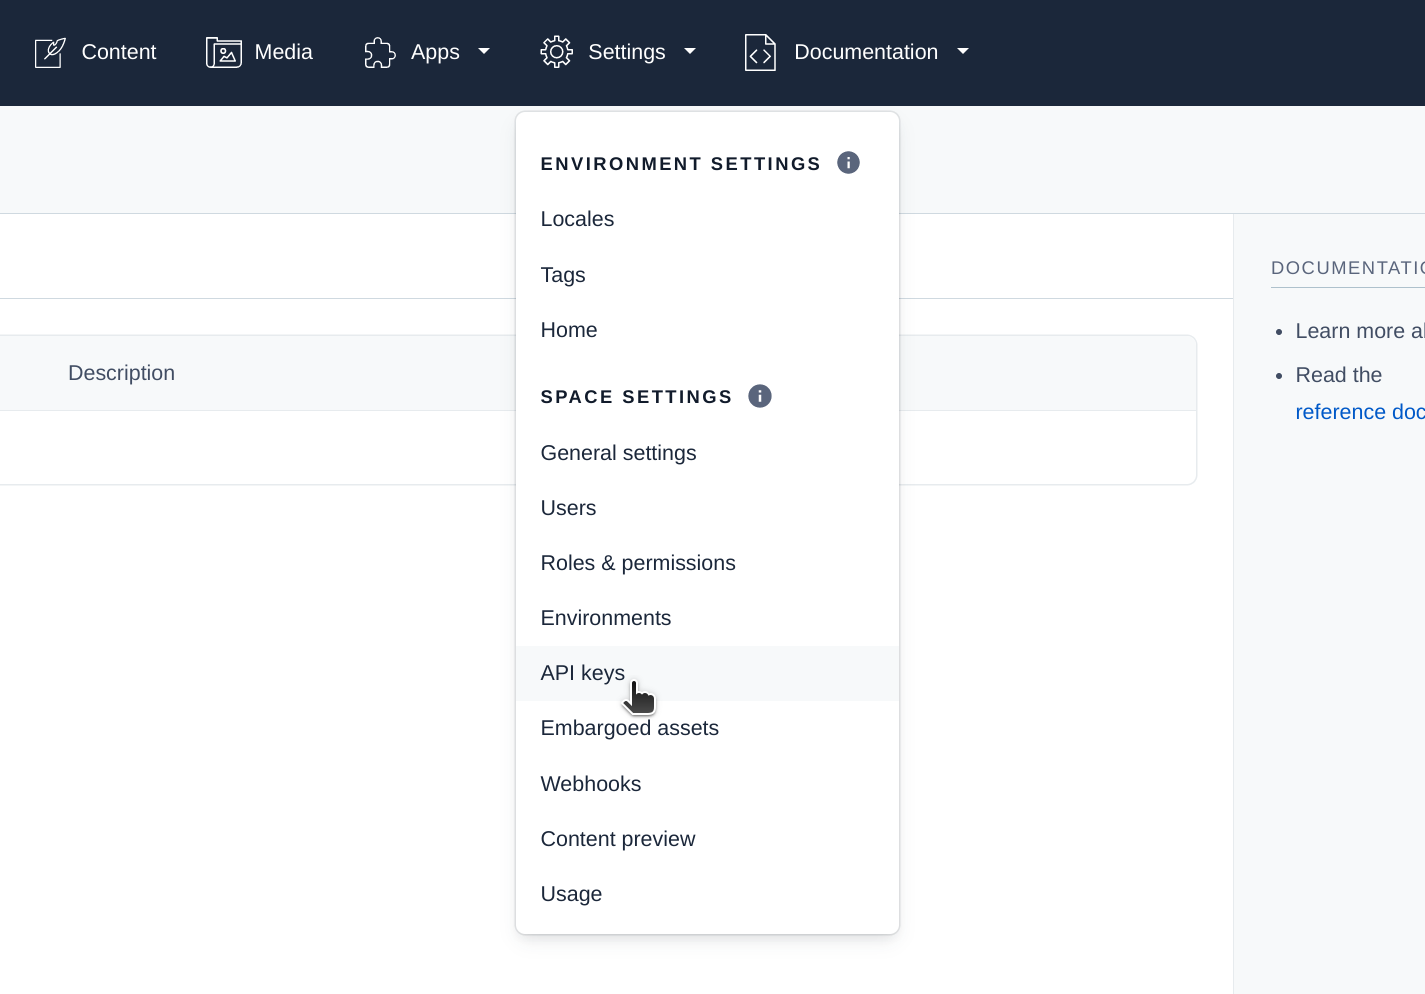
Click the button to add a new API key. You can name it whatever you want, I just chose App (render.com), since we’ll be using this API key on Render.com once we begin hosting our website.
Before you click Save, take note of your space id and content delivery API access key. You will need them in just a bit.
Click Save, and now it’s time to set up the Contentful client in our project.
Install the Contentful SDK ↴
npm install contentful
Once that finishes, create lib/contentful.js ↴
import contentful from 'contentful';

const client = contentful.createClient({
  space: '<space id>',
  accessToken: '<content delivery API access key>',
});

export default client;
Make sure to replace the values enclosed in angled brackets with those from the previous step.
This will create a client that we can use to consume data from Contentful.
Now, let’s use the client to pull in the data we’ve just created into our build script.
Update scripts/build.js ↴
import fs from 'fs';
import path from 'path';

import client from '../lib/contentful.js';
import nunjucks from '../lib/nunjucks.js';

const data = await client.getEntries({
  content_type: 'page',
});

// ...
Before we continue, it’s important to recognize that writing the Contentful API key in plain text is dangerous.
So, let’s use the .env file we created at the beginning of the project to store our secrets.
Update .env ↴
CONTENTFUL_SPACE=<space ID>
CONTENTFUL_ACCESS_TOKEN=<content delivery API access key>
Now we need a way to import these into our project. For that we can use dotenv.
Install dotenv ↴
npm install dotenv
And then import it in your build.js script ↴
import 'dotenv/config';

import fs from 'fs';
import path from 'path';

// ...
And that’s it! Now, all your environment variables stored in .env are accessible via process.env.
Now let’s configure our Contentful client to use these values instead.
Update lib/contentful.js ↴
const client = contentful.createClient({
  space: process.env.CONTENTFUL_SPACE,
  accessToken: process.env.CONTENTFUL_ACCESS_TOKEN,
});
With that all set up, let’s use the data from Contentful to build our pages dynamicaly.
Update scripts/build.js ↴
// ...

const pages = data.items;

pages.forEach((page) => {
  const ctx = page.fields;
  const outputPath = path.normalize(`dist/${ctx.url}/index.html`);

  nunjucks.render('page.njk', ctx, (err, res) => {
    if (err) throw err;

    fs.mkdir('dist', { recursive: true }, () => {
      fs.writeFile(outputPath, res, 'utf-8', () => {
        console.log(`Wrote "${outputPath}"`);
      });
    });
  });
});
Here we’re using the value of the URL field we defined in Contentful to determine the output path. So for example, if url was /foo/bar, the file would be output to /dist/foo/bar/index.html.
We use path.normalize() so that we can be sure that any single or duplicate path separators are replaced with a single, platform-specific path segment separator (/ for POSIX, \ for Windows). It’s just good practice; we don’t want to make any assumptions about which platform this script will be run on.
We’re now passing all properties of the fields object for each page into the template. So we need to update our page.njk template to handle this new context. Instead of message, le’ts render content.
Update page.njk ↴
{% extends "layout.njk" %}

{% block content %}
  {{ content | markdown | safe }}
{% endblock %}
Here, content is the value of the Content field for the entry (this is markdown!).
Rebuild your project. You should now see a new directory in dist called test, and test/index.html should be the content from the entry on Contentful!
Now what about the entry title? Let’s add that to the window title.
Replace <title>My app</title> in src/layout.njk with ↴
{% if title %}
  <title>{{ title }} — My app </title>
{% else %}
  <title>My app</title>
{% endif %}
At this point in the tutorial, your project should look like this (ignoring .git, dist, and node_modules) ↴
app/
├─ lib/
│  ├─ contentful.js
│  ├─ markdown.js
│  └─ nunjucks.js
├─ scripts/
│  └─ build.js
├─ src/
│  ├─ layout.njk
│  └─ page.njk
├─ .env
├─ .gitignore
└─ package.json
We’ve now hooked up a CMS to our static website, and the next step is getting a local development server up and running.
Static file server
So far we’ve been verifying our work by looking at the build files in our code editor.
But now it’s about time we moved to a development server.
We could write our own static file server, but this is a situation in which we’re better of having something else solve the problem for us. We’ll use serve-handler to handle our requests and then bake that into a vanilla Node.js http server.
Install serve-handler ↴
npm install -D serve-handler
The -D flag indicates to npm that this should be a dev dependency, since we’re only using it locally.
Create scripts/server.js ↴
import handler from 'serve-handler';
import http from 'http';

const server = http.createServer((req, res) => {
  return handler(req, res, {
    public: 'dist',
  });
});

server.listen(3000, () => {
  console.log('Listening on port 3000...');
});
Next, add a new server script to accompany your previous build npm script.
Update package.json ↴
"scripts": {
  "build": "node scripts/build.js",
  "server": "node scripts/server.js"
}
Open a new tab in your terminal, and run npm run server. Your website should now be accessible at http://localhost:3000!
Since you created a page at /test in the previous step, let’s check it out. Go to http://localhost:3000/test.
You should see your markdown test page!

Keep this server running in the background for the rest of the tutorial.
At this point in the tutorial, your project should look like this (ignoring .git, dist, and node_modules) ↴
app/
├─ lib/
│  ├─ contentful.js
│  ├─ markdown.js
│  └─ nunjucks.js
├─ scripts/
│  ├─ build.js
│  └─ server.js
├─ src/
│  ├─ layout.njk
│  └─ page.njk
├─ .env
├─ .gitignore
└─ package.json
Certainly could use some styling. Let’s tackle that next.
Static files
I want to start this section off by saying that we are not going to be doing any CSS pre-processing using SASS or Less. We also won’t be bundling our JavaScript files with Webpack or transpiling them with Babel.
As mentioned before, we want this project to be fairly lightweight and last a while without needing to be updated. You might also be surprised how far vanilla CSS and JavaScript have come. All modern browsers support JavaScript modules natively now, which pretty much eliminates the need for bundling. Nesting CSS selectors is also on the way!
The goal in this section is to create a directory for our static files, and then copy them over to the dist directory after each build.
You can do this yourself, but to get some decent baseline styles going, let’s use vanilla.css.
Create the src/static/css directory ↴
mkdir -p src/static/css
Copy the contents of vanilla.css, and paste them into a new vanilla.css file.
Create src/static/css/vanilla.css ↴
/* vanilla.css content here */
Create src/static/css/styles.css ↴
@import "./vanilla.css";
Your project should look like this (NB: the tree below has been abbreviated to only show relevant changes) ↴
app/
╪
├─ src/
│  ├─ static
│  │  └─ css
│  │     ├─ styles.css
│  │     └─ vanilla.css
│  ╪
│  └─ page.njk
╪
└─ package.json
Now we need to write a new task in our build script to copy over these static assets to the dist directory.
Our build script is starting to get a little complicated, so let’s separate each task into its own function.
First, let’s make a clean, extensible way to fetch data from Contentful ↴
async function getEntries(contentType) {
  const data = await client.getEntries({
    content_type: contentType,
  });

  return data.items;
}

async function getData() {
  const [pages] = await Promise.all([
    getEntries('page'),
    // ...
  ]);

  return {
    pages,
  };
}
If you later decide to create other content types, you can easily add it here and collate it with the pages data.
Now let’s move on to buildPages() ↴
async function buildPages() {
  const data = await getData();

  data.pages.forEach((page) => {
    // ...
  });
}
This is good, but as our build script expands, we need to be able to tell when all of the pages have been built. Right now, all of these actions are casted and out of our control.
Let’s wrap this work in promises ↴
async function buildPages() {
  const data = await getData();

  return Promise.all([
    ...data.pages.map((page) => {
      const ctx = page.fields;
      const outputPath = path.normalize(`dist/${ctx.url}/index.html`);

      return new Promise((resolve) => {
        nunjucks.render('page.njk', ctx, (err, res) => {
          if (err) throw err;

          fs.mkdir('dist', { recursive: true }, () => {
            fs.writeFile(outputPath, res, 'utf-8', () => {
              console.log(`Wrote "${outputPath}"`);
              resolve();
            });
          });
        });
      });
    }),
  ]);
}
Essentially what we’ve done here is converted each item in the loop into a promise (using .map() instead of .forEach()), and then we’re using Promise.all() to wait until each promise in the array has resolved.
Great, now let’s add a build task ↴
async function build() {
  await buildPages();
}
Let’s add a new function called copyStatic() ↴
function copyStatic() {
  // TODO
}
At this point, recursively walking through the static directory and copying files over one by one is a bit more work than we need to burden ourselves with, so let’s allow one more dependency in our project, fs-extra. fs-extra has only three dependencies, and is extremely stable and well-maintained.
Install fs-extra ↴
npm install fs-extra
Let’s replace our existing fs import with fs-extra, and then update our copyStatic() function ↴
import fse from 'fs-extra';
import path from 'path';

// ...

function copyStatic() {
  return fse.copy('src/static', 'dist');
}
We can also clean up our buildPages() function using fs-extra’s outputFile() function ↴
async function buildPages() {
  const data = await getData();

  return Promise.all([
    ...data.pages.map((page) => {
      const ctx = page.fields;
      const outputPath = path.normalize(`dist/${ctx.url}/index.html`);

      return new Promise((resolve) => {
        nunjucks.render('page.njk', ctx, (err, res) => {
          if (err) throw err;

          fse.outputFile(outputPath, res, () => {
            console.log(`Wrote "${outputPath}"`);
            resolve();
          });
        });
      });
    }),
  ]);
}
Now let’s update our build() task and make sure to call it ↴
async function build() {
  await buildPages();
  await copyStatic();
}

build();
Give that a run to make sure it all works.
You might have also noticed that we’re never actually deleting any files, from dist. So if we were to delete a static file or a page on Contentful, it won’t be removed from dist.
Let’s change that by writing a new clean task ↴
function clean() {
  return fse.remove('dist');
}
And then add that to the start of the build task ↴
async function build() {
  await clean();
  await buildPages();
  await copyStatic();
}
Altogether, your build.js script should look like this ↴
import 'dotenv/config';

import fs from 'fs-extra';

import client from '../lib/contentful.js';
import nunjucks from '../lib/nunjucks.js';

function clean() {
  return fse.remove('dist');
}

function copyStatic() {
  return fse.copy('src/static', 'dist');
}

async function getEntries(contentType) {
  const data = await client.getEntries({
    content_type: contentType,
  });

  return data.items;
}

async function getData() {
  const [pages] = await Promise.all([
    getEntries('page'),
    // ...
  ]);

  return {
    pages,
  };
}

async function buildPages() {
  const data = await getData();

  return Promise.all([
    ...data.pages.map((page) => {
      const ctx = page.fields;
      const outputPath = path.normalize(`dist/${ctx.url}/index.html`);

      return new Promise((resolve) => {
        nunjucks.render('page.njk', ctx, (err, res) => {
          if (err) throw err;

          fse.outputFile(outputPath, res, () => {
            console.log(`Wrote "${outputPath}"`);
            resolve();
          });
        });
      });
    }),
  ]);
}

async function build() {
  await clean();
  await buildPages();
  await copyStatic();
}

build();
If you comment out the last two tasks in the build function and run the build script, you should see your dist file disappear. Perfect!
Now we need to actually include the CSS file on our webpage. To do that, we’ll need to modify layout.njk.
You’ll need to append a <link /> tag to the end of the <head> ↴
  <!-- ... -->
  <link rel="stylesheet" href="/css/styles.css" />
</head>
Save, and then rebuild. Now, open /test in your browser again.
It should look a lot cleaner!
We can also add some JavaScript files, if you need them. Let’s create an empty main.js in src/static/js.
And then in your layout.njk, add a <script> tag to the bottom of the <head>, below the <link> you just added ↴
  <!-- ... -->
  <script type="module" src="./js/main.js"></script>
</head>
Inside of main.js, you can always use ES modules syntax like import to import other JavaScript files that you have in static/js. It will just work, no Webpack needed! Fuuuutuuureee!
At this point in the tutorial, your project should look like this (ignoring .git, dist, and node_modules) ↴
app/
├─ lib/
│  ├─ contentful.js
│  ├─ markdown.js
│  └─ nunjucks.js
├─ scripts/
│  ├─ build.js
│  └─ server.js
├─ src/
│  ├─ static
│  │  ├─ css
│  │  │  ├─ styles.css
│  │  │  └─ vanilla.css
│  │  └─ js
│  │     └─ main.js
│  ├─ layout.njk
│  └─ page.njk
├─ .env
├─ .gitignore
└─ package.json
404 page
Next we need a 404 page.
Render.com will automatically use /404.html if one exists, so let’s create one.
Create src/404.njk ↴
{% extends "layout.njk" %}

{% set title = "404" %}

{% block content %}
  <p>Not found.</p>
{% endblock %}
Notice that this page is extending the default layout, just like our Contentful pages.
The layout uses data (e.g. title) to control different aspects of the page. However, because this page isn’t generated from data in Contentful, we have to tell provide it manually.
To set the value of title, we can simply call {% set title ... %}. In this case, we’re setting it to "404".
Next, we need to update our build script to handle local pages, not just pages from Contentful.
Update scripts/build.js ↴
// ...

function buildPage(template, dest, ctx = {}) {
  const outputPath = path.normalize(dest);

  return new Promise((resolve) => {
    nunjucks.render(template, ctx, (err, res) => {
      if (err) throw err;

      fse.outputFile(outputPath, res, () => {
        console.log(`Wrote "${outputPath}"`);
        resolve();
      });
    });
  });
}

async function buildPages() {
  const data = await getData();

  return Promise.all([
    buildPage('404.njk', 'dist/404.html'),

    // Contentful pages
    ...data.pages.map((page) => {
      const ctx = page.fields;
      const outputPath = `dist/${ctx.url}/index.html`;

      return buildPage('page.njk', outputPath, ctx);
    }),
  ]);
}
Now we have a new generic function called buildPage() which can be used to render any template to any path with any data.
We’ve updated buildPages() to build our custom 404.njk page, as well as the rest of the dynamic pages from contentful.
If you rebuild the site and visit a URL that doesn’t exist, you should see “Not found” instead!
At this point in the tutorial, your project should look like this (ignoring .git, dist, and node_modules) ↴
app/
├─ lib/
│  ├─ contentful.js
│  ├─ markdown.js
│  └─ nunjucks.js
├─ scripts/
│  ├─ build.js
│  └─ server.js
├─ src/
│  ├─ static
│  │  ├─ css
│  │  │  ├─ styles.css
│  │  │  └─ vanilla.css
│  │  └─ js
│  │     └─ main.js
│  ├─ 404.njk
│  ├─ layout.njk
│  └─ page.njk
├─ .env
├─ .gitignore
└─ package.json
Blog posts
The next step is to add a new page which automatically collates all the pages you created in chronological order.
We don’t want to list every page we create on the blog, because our Page content type can be used for anything, like creating an /about page.
So, let’s create a new field for the Page content type.
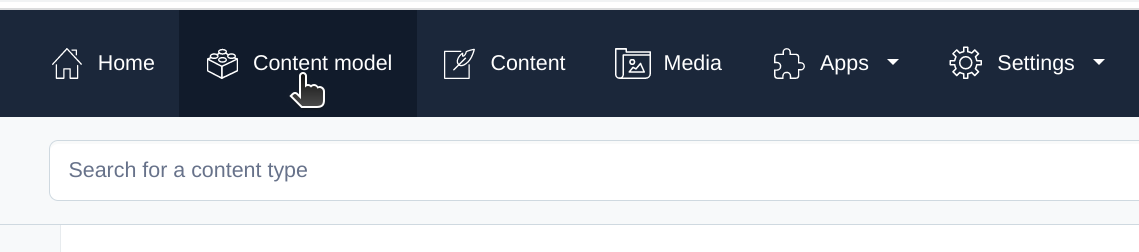
Go to your Contentful dashboard, navigate to Content model and click on your Page content type to edit the fields.
Click on Add field and select the Boolean type.
Name the field Blog post (blogPost).
Click Create.
Now add another field. Select the Date and time type.
Name the field Date (date).
Click Create and configure.
Under Appearance, choose Date only for the Format.
Now re-order the fields so that Content comes last (it’s just easier this way).
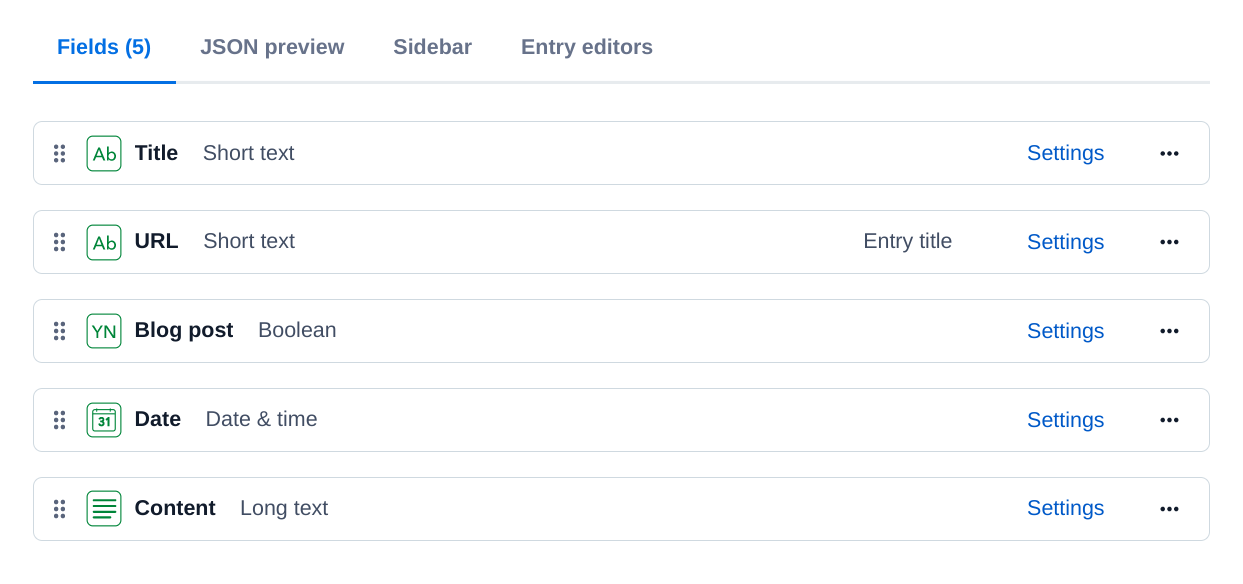
Click Save.
Navigate to Content and create a new page.
You can write whatever you want, but I chose Hello world! for the title, /hello for the URL, and Welcome to my first blog post. as the content.
Just make sure you set a date and choose Yes under Blog post.
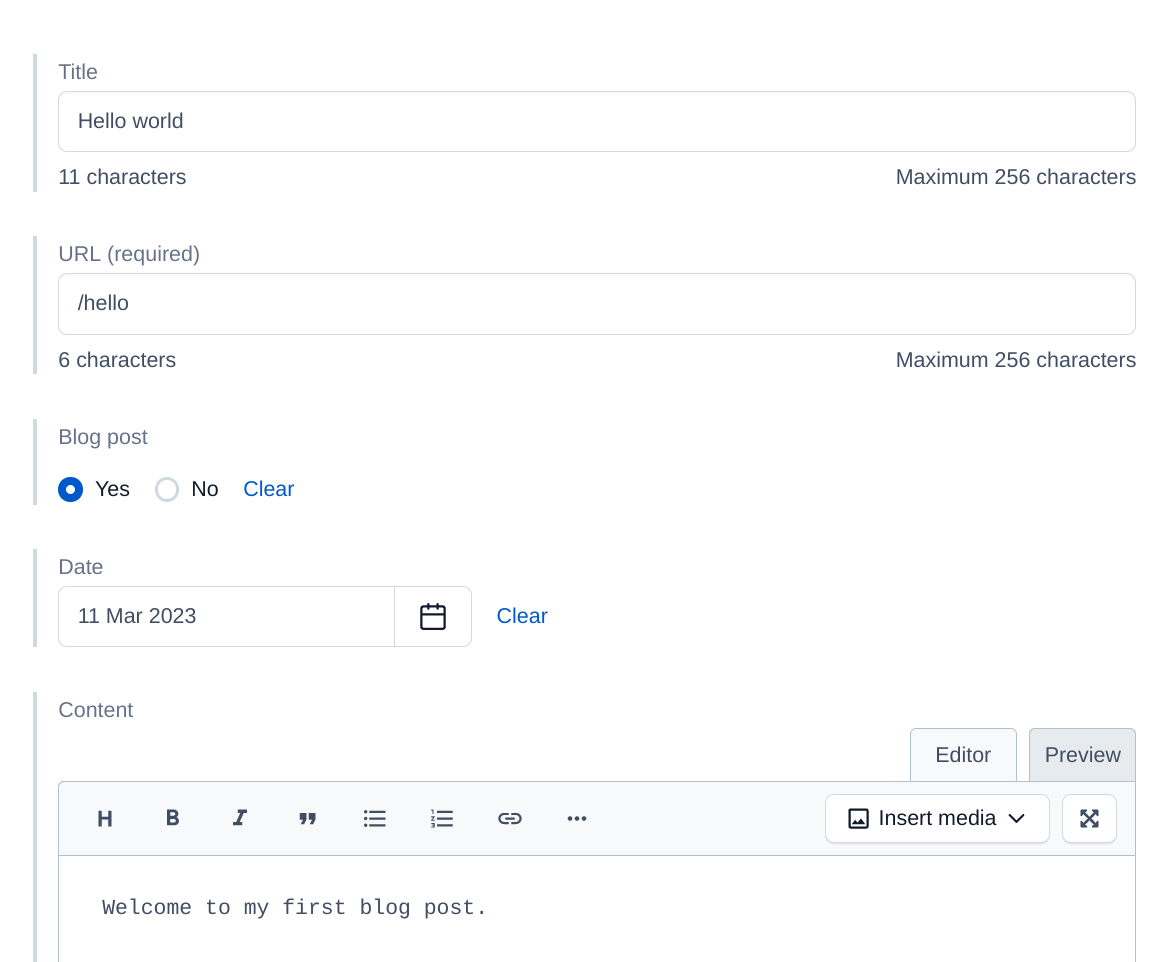
Rebuild your project, then visit /hello in your browser.
You should see your blog post!
Now we need to create a page with a list of all blog posts.
First, we need to create a new custom Nunjucks filter selectByField. This will allow us to filter our pages to only those that are blog posts.
Add the following filter underneath the markdown filter you previously defined.
Update lib/nunjucks.js ↴
// ...

env.addFilter('selectByField', (items, field, value = true) => {
  return items.filter((item) => {
    return Boolean(item.fields[field]) === value;
  });
});
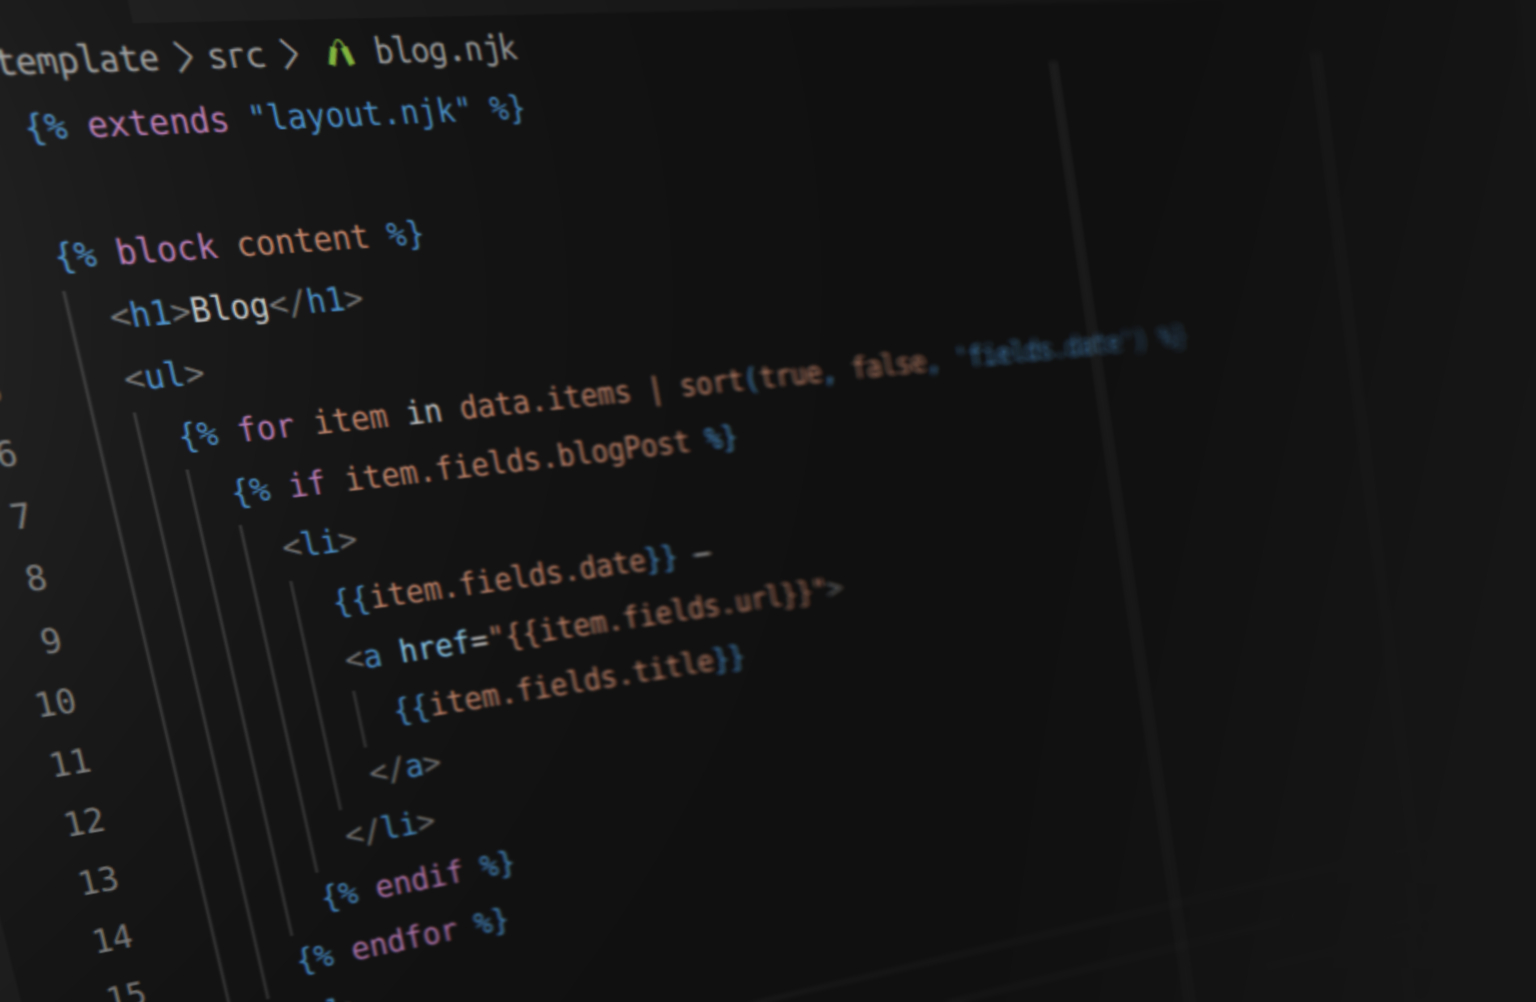
Create src/blog.njk ↴
{% extends "layout.njk" %}

{% set title = "Blog" %}
{% set url = "/blog" %}

{% block content %}
  <h1>Blog</h1>
  <ul>
    {% for page in pages | selectByField('blogPost') | sort(true, false, 'fields.date') %}
      <li>
        {{ page.fields.date }} —
        <a href="{{ page.fields.url }}">
          {{ page.fields.title }}
        </a>
      </li>
    {% endfor %}
  </ul>
{% endblock %}
Just like we did with the 404 page, we set a few local variables to help the default layout control certain page features.
We will also need access to pages. Since pages is something that could be useful everywhere, not just on the blog page, we will define this using a Nunjucks global. Nunjucks globals can be accessed by all templates.
Next, simply add a new line for blog.njk to the buildPages task in your build script.
Update scripts/build.js ↴
async function buildPages() {
  const data = await getData();

  // Template globals.
  nunjucks.addGlobal('pages', data.pages);

  return Promise.all([
    buildPage('404.njk', 'dist/404.html'),
    buildPage('blog.njk', 'dist/blog/index.html'),

    // Contentful pages
    ...data.pages.map((page) => {
      const ctx = page.fields;
      const outputPath = `dist/${ctx.url}/index.html`;

      return buildPage('page.njk', outputPath, ctx);
    }),
  ]);
}
Then rebuild your project and visit /blog in your browser.
You should now see your blog!

At this point in the tutorial, your project should look like this (ignoring .git, dist, and node_modules) ↴
app/
├─ lib/
│  ├─ contentful.js
│  ├─ markdown.js
│  └─ nunjucks.js
├─ scripts/
│  ├─ build.js
│  └─ server.js
├─ src/
│  ├─ static
│  │  ├─ css
│  │  │  ├─ styles.css
│  │  │  └─ vanilla.css
│  │  └─ js
│  │     └─ main.js
│  ├─ 404.njk
│  ├─ blog.njk
│  ├─ layout.njk
│  └─ page.njk
├─ .env
├─ .gitignore
└─ package.json
Site navigation
The last major piece for our website is to create some sort of persistent global navigation.
First we’ll update our layout.
Add this between <div id="content"> and <main> ↴
<header>
  <nav>
    <a href="/" class="{{ 'active' if url == '/' }}">
      Home
    </a>
    <a href="/blog" class="{{ 'active' if blogPost or url == '/blog' }}">
      Blog
    </a>
  </nav>
</header>
Then, add the following to src/css/styles.css ↴
header nav {
  display: flex;
}

header nav a:not(:last-of-type) {
  padding-right: 16px;
}

header nav a.active {
  font-weight: bold;
}
Come to think of it, we don’t have an index page yet.
Why don’t you go and create one in Contentful. Skip the title, dont mark it as blog post, and just use / for the URL.
Then, of course, rebuild your project.
Next up: deployment!
Deploying to Render.com
It’s finally time to deploy your site.
You could adapt your site to use GitHub Pages, a popular choice for static sites, but GitHub Pages is a little limiting in my opinion. Render.com gives you much greater control over, and it’s free just like GitHub Pages!
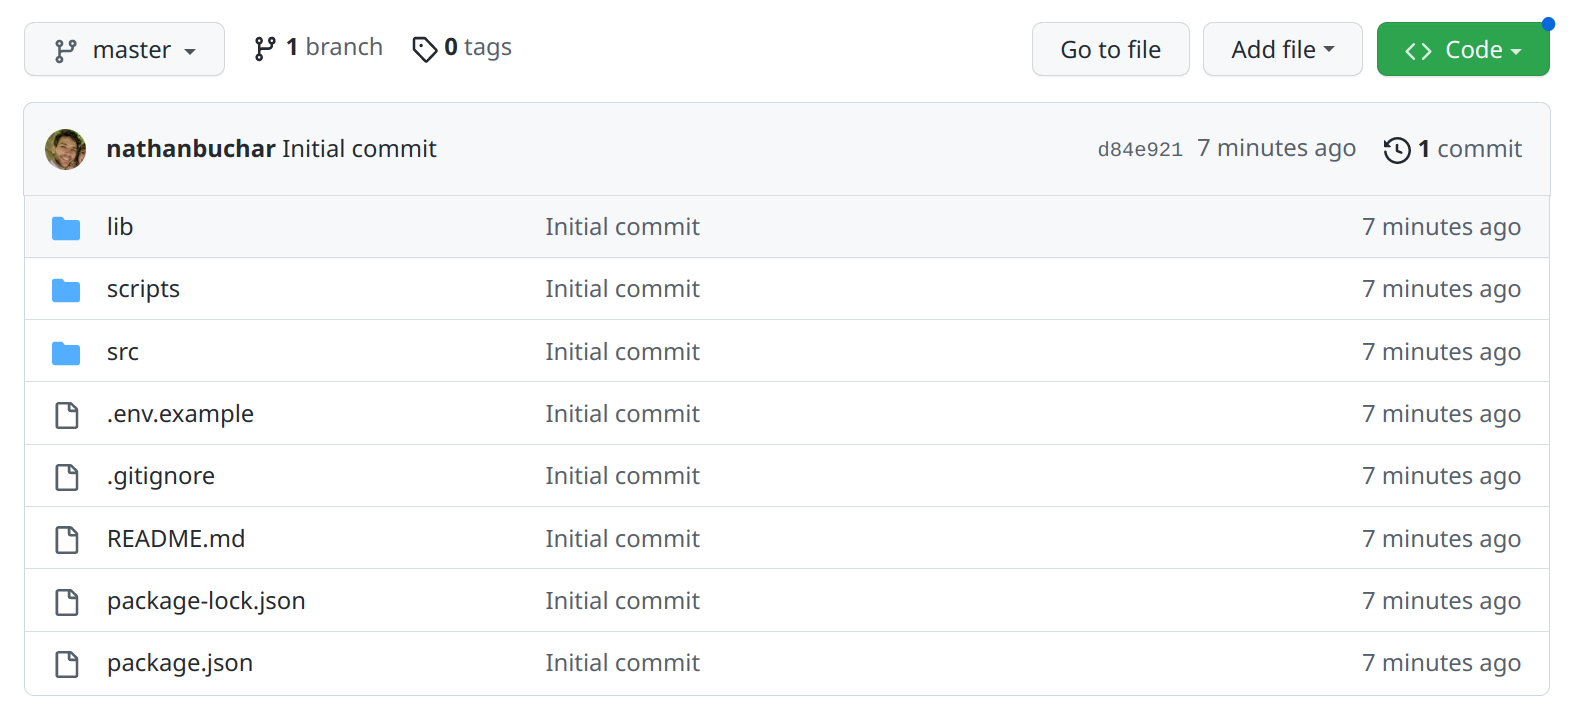
Render.com will pull your app from Github, so the first step is to push your project to a new repo on GitHub.
Before you do, make sure your .env file is gitignored and your app secrets arent’s stored in plaintext anywhere!
Next, log in to your dashboard on Render.com, or create an account if this is your first time.
Render.com offers free hosting for static websites (nice!).
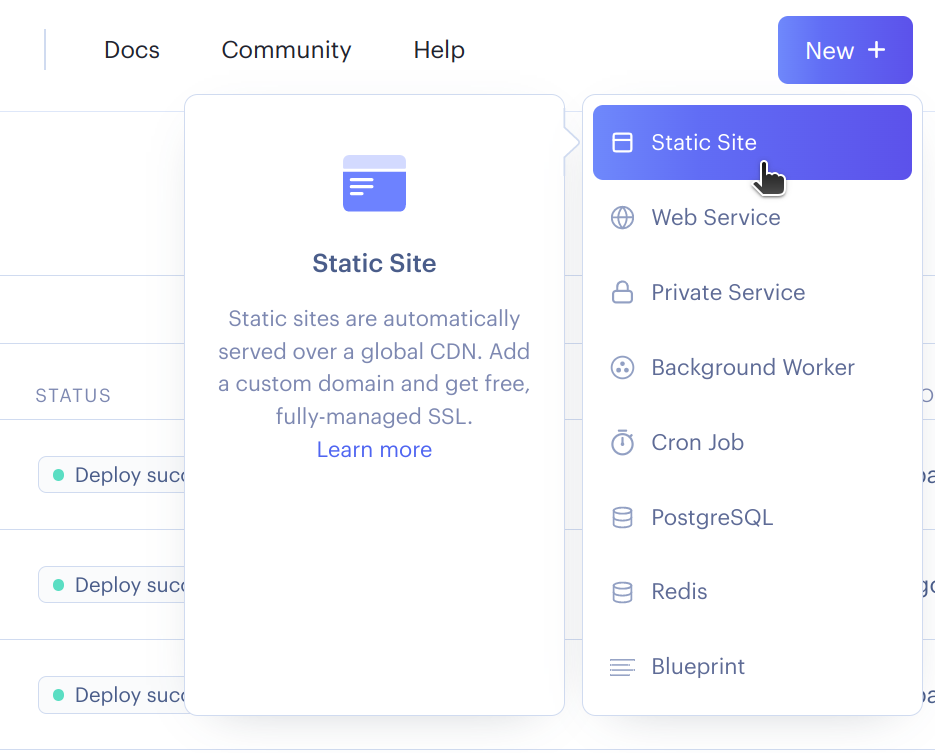
Click New and select Static Site.
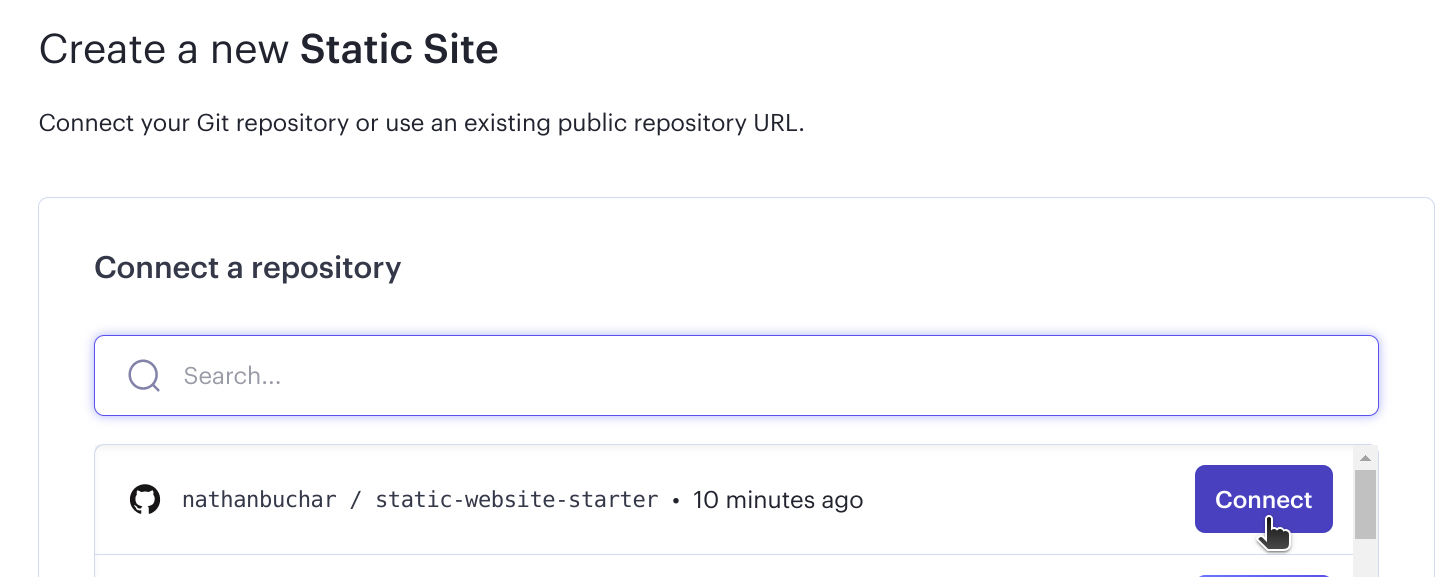
Connect your account with GitHub, and then connect the repository you just created.
On the next screen, name your app whatever you’d like.
For Root Directory, keep it empty.
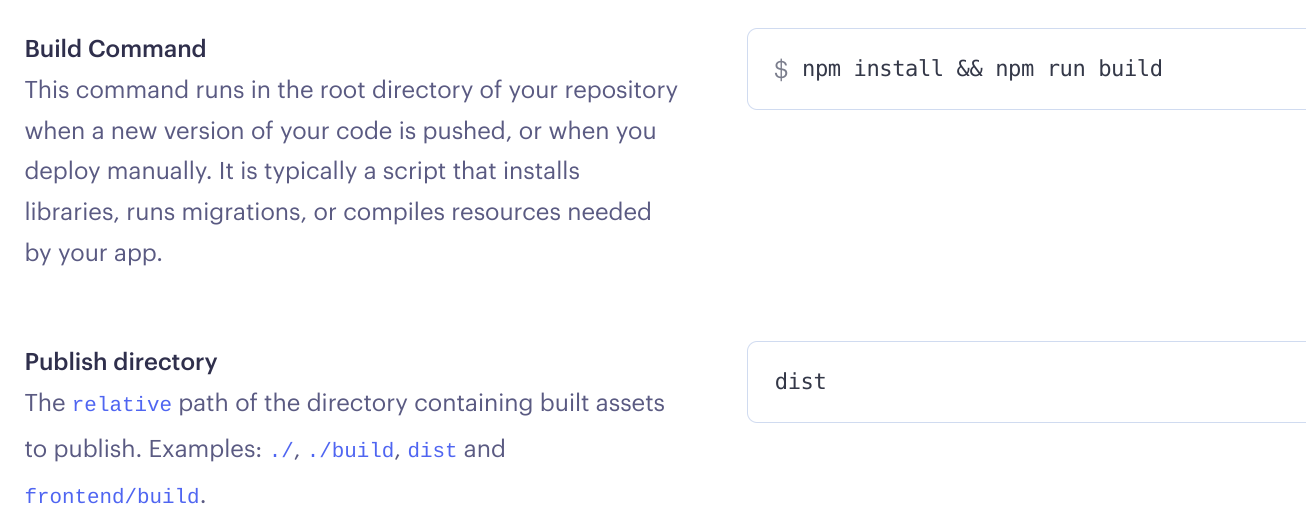
The default yarn; yarn build will work for Build Command just fine, but since I’ve been using npm up until this point, I’m going to update mine to npm install && npm run build.
Most importantly, set the Publish directory to dist.
Don’t click create just yet!
Now click the Advanced toggle. We need to update a few more configs.
Click Add Environment Variable. We’ll need to add three:
- Set
CONTENTFUL_ACCESS_TOKENto value you saved in your.env - Set
CONTENTFUL_SPACEto value you saved in your.env - Set
NODE_ENVtoproduction
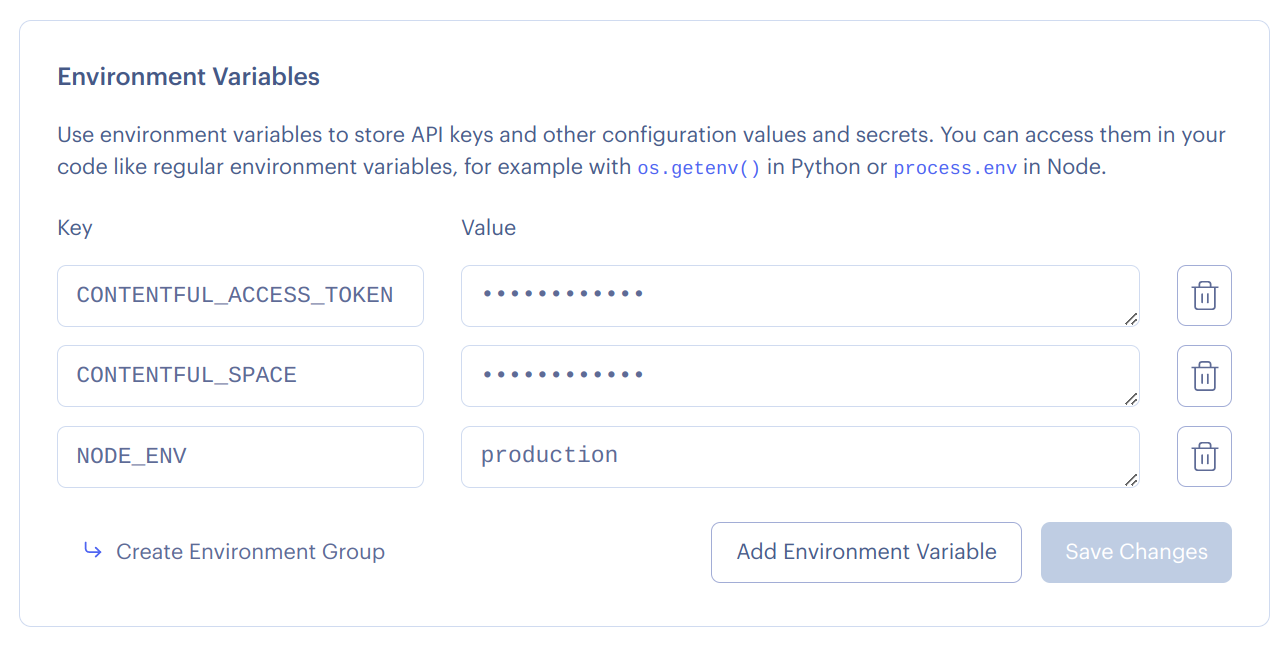
Scroll down to the bottom and click Create Static Site.
Congratulations, your app should now be happily deploying.
Once it’s been deployed, you can access it using the URL displayed at the top of the page.

You can take this one step further and add a custom domain, if you have one. The settings for custom domains are in the Settings tab.
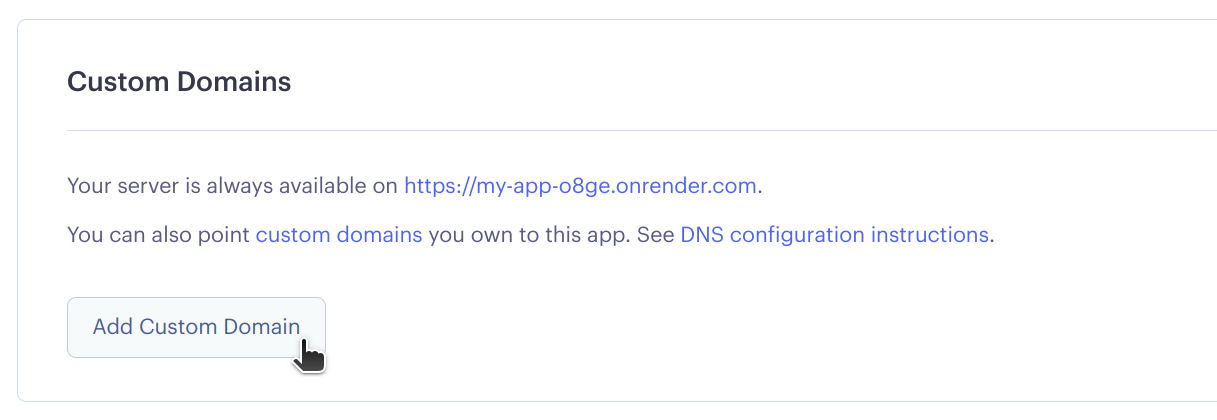
But I’ll leave that for you.
Automatic redeployment on publish
So far everything works well, but there’s one major drawback: any time you publish a new entry, you’ll need to tell Render.com to redeploy the website because the data from Contentful is only used to generate the site once per build.
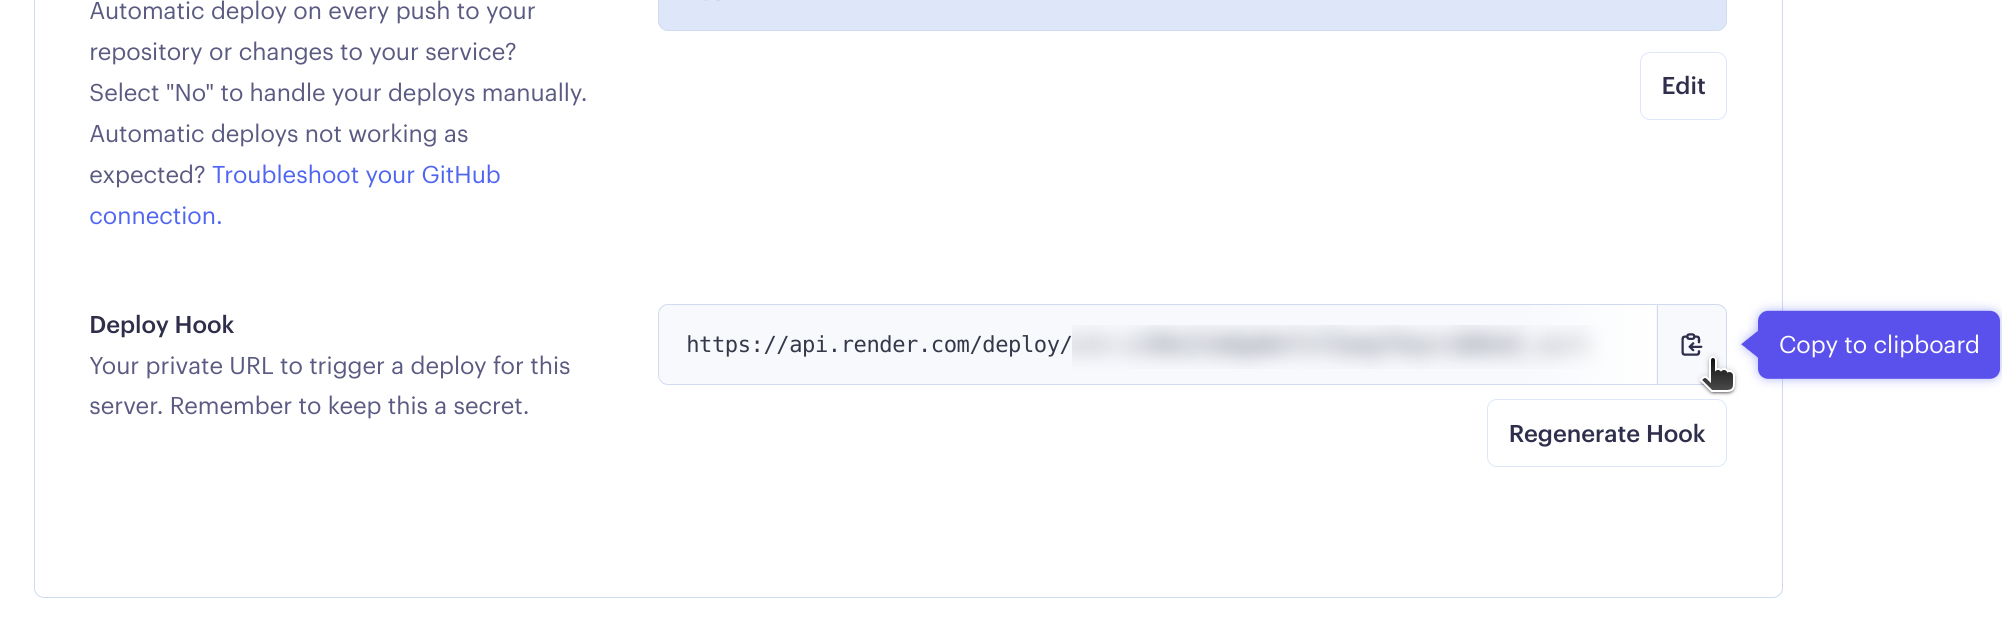
We can improve this using webhooks. Fortunately, Render.com supports redeploy webhooks, and Contentful has a system for webhooks as well. We are able to create a webhook on the Contentful side which automatically calls our websites redeploy hook after every publish. *Chef’s kiss* perfect! 🤌
First, in the dashboard for your website on Render.com, navigate to Settings and find the Deploy Hook. This is a secret URL which will redeploy your website when accessed.
Next, navigate to the Webhooks settings for your Contentful space.
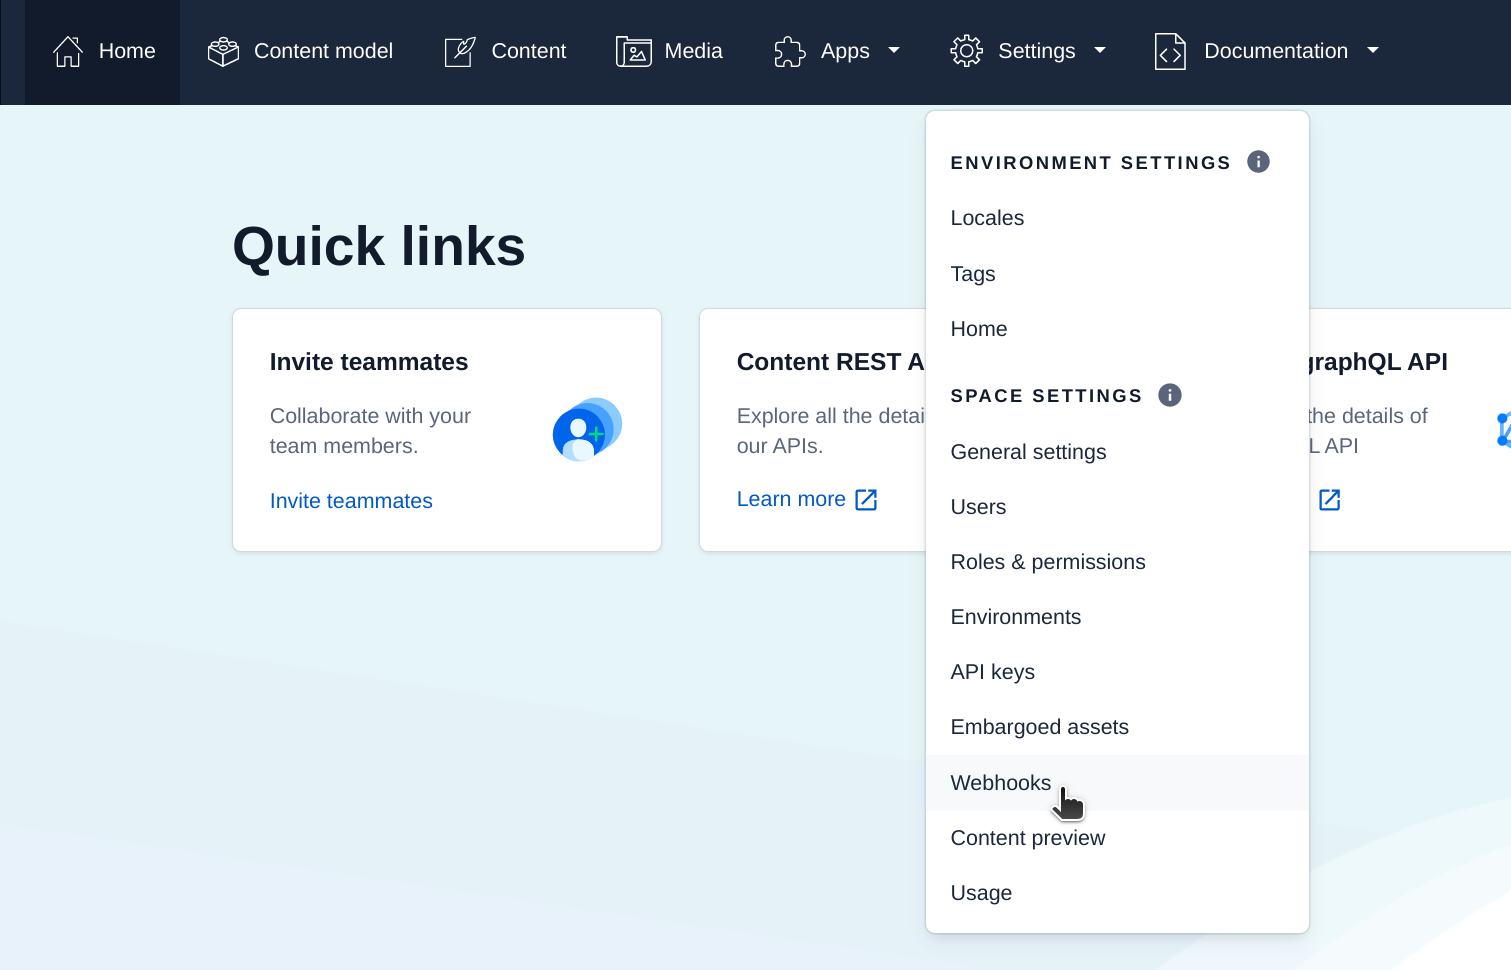
Add a new webhook. For the URL, be sure to select GET and then paste in your Render.com redeploy webhook.
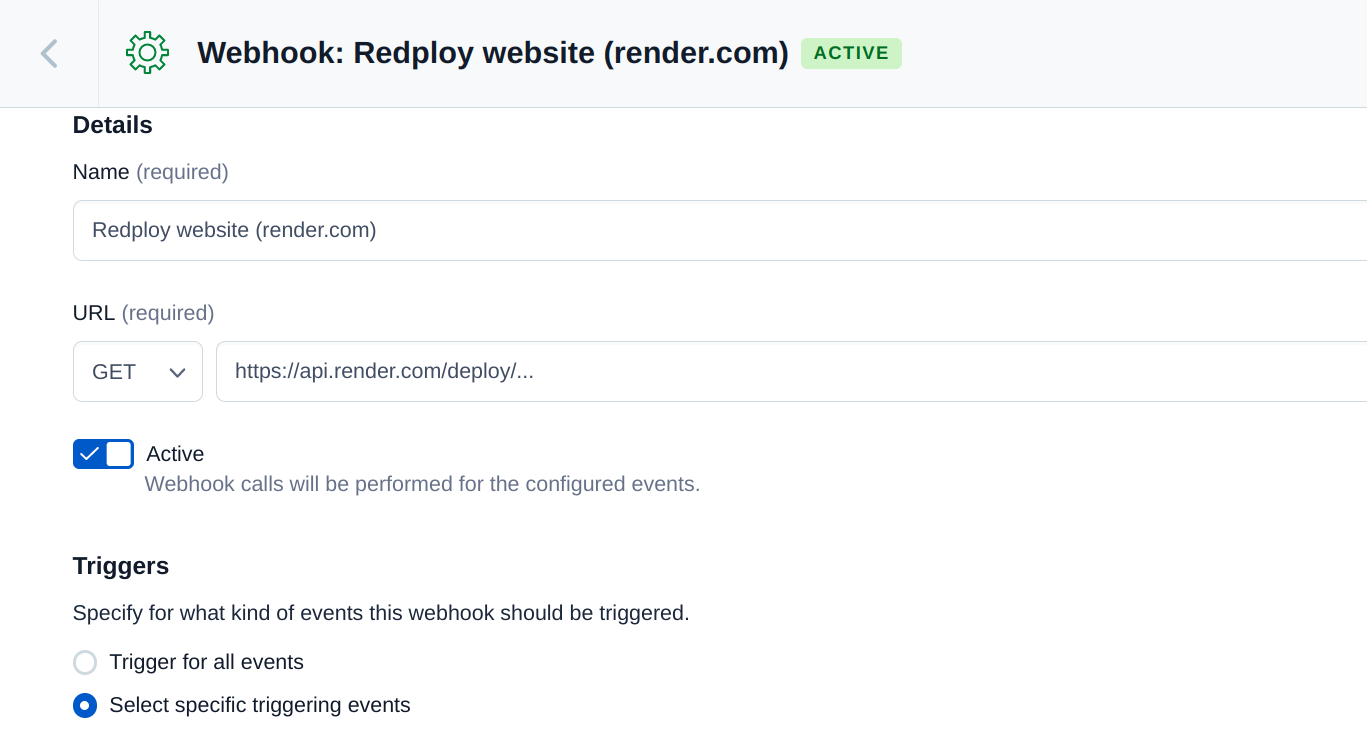
For Webhooks, be sure to change from Trigger for all events to Select specific triggering events.
Check the box for publishing entries only. This will prevent your app from redeploying from every event except for when you publish a new entry.
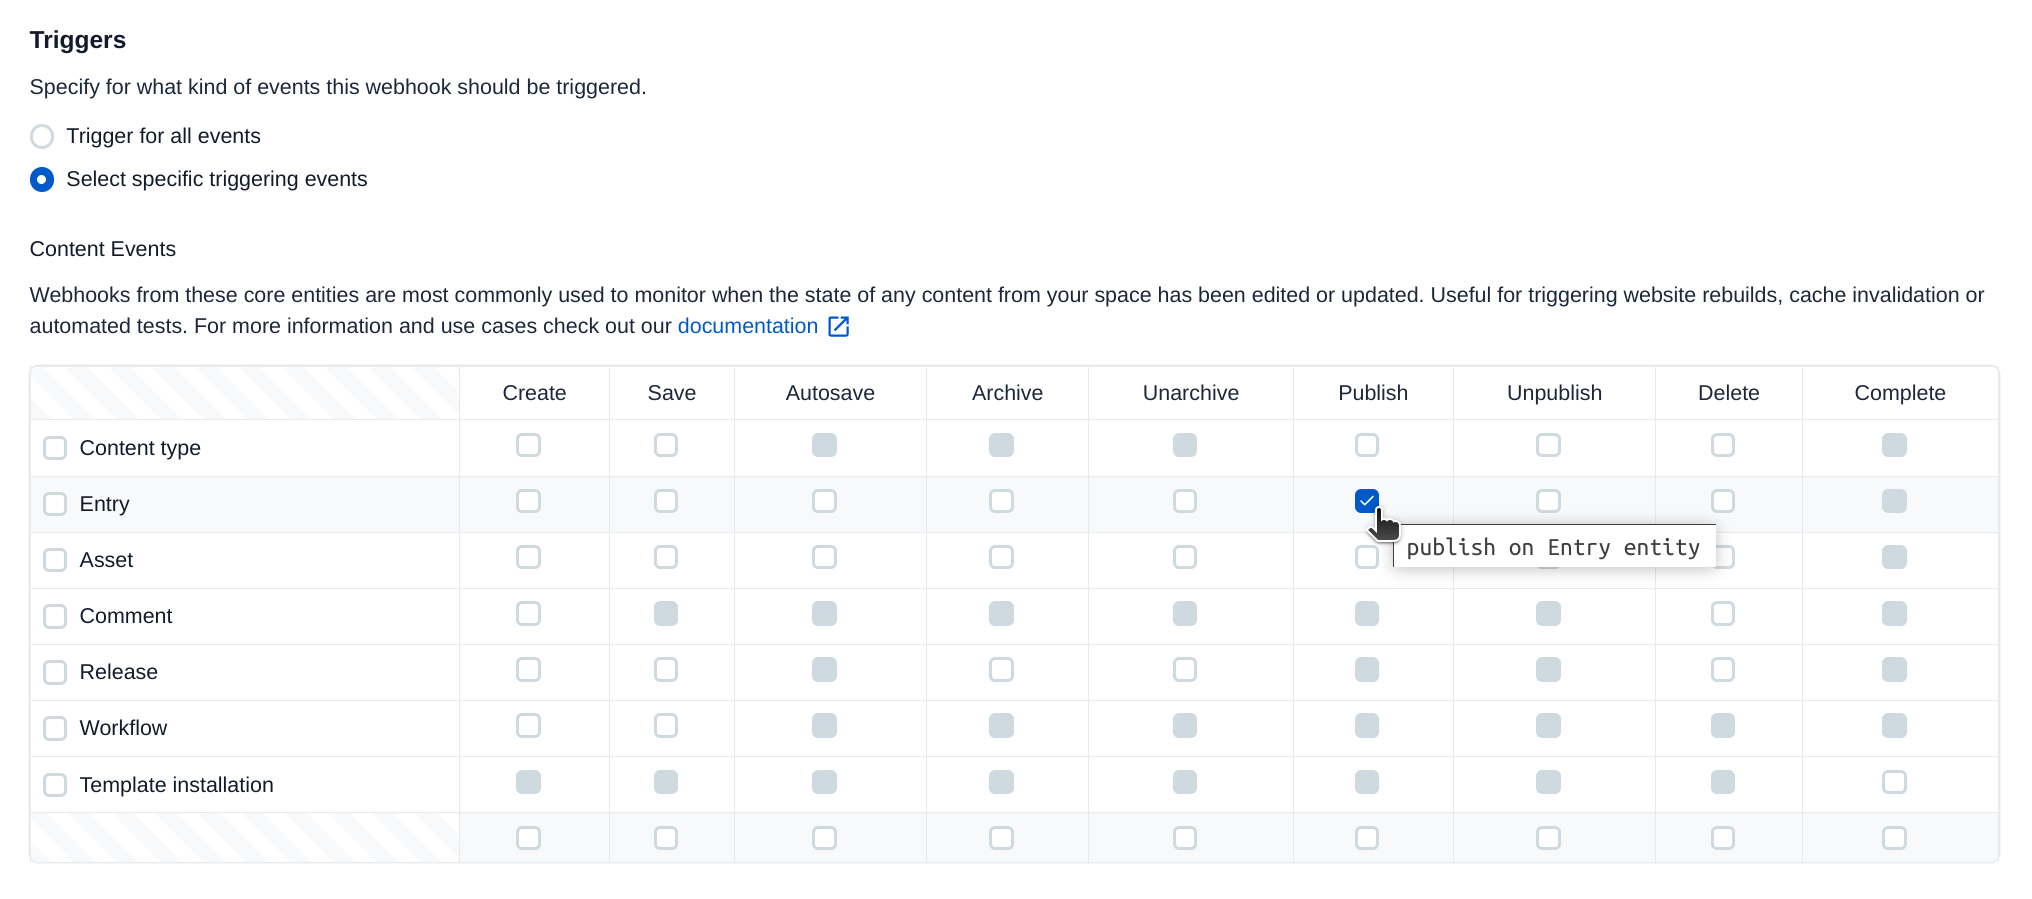
The defaults for the other settings should be fine, but double check them just in case Contentful changed them since the time of this writing.
Save your webhook and you’re all set! The next time you publish a new entry, your website on Render.com will be redeployed.
Finish
You’re all done! You’ve successfully built and deployed a lightweight static site generator powered by Contentful and Render.com.
Suggested further improvements:
- Improve the styling beyond just vanilla.css.
- Improve development QOL, by using tools like Gulp to run tasks for you and automatically rebuild when files change.
- Register additional markdown-it plugins to support things like code highlighting, footnotes, and LaTeX.
Please consider leaving me a comment if you found any value in this guide. Take care!
Comments
Loading…